
In this article, we learn how to copy from Visual Studio Code with color syntax highlighting to various other applications including Word, PowerPoint, Outlook, OneNote, and Gmail to achieve beautiful, clear code samples for documentation, presentations, and general communication. This will prove useful whether you are using JavaScript, JSON, HTML, CSS, TypeScript, Markdown, C++, Java, PHP, Python, Go, T-SQL, XML, C# or a host of other languages and data formats that Visual Studio Code supports.
How is this accomplished? It’s very simple! When you are in VS Code copy your selected code to the clipboard, VS Code brings the color syntax formatting along for the ride so the formatted text can be pasted into applications such as Word and Gmail. We’ll see this in action with various applications and provide some additional steps to maximize the beauty of your syntax highlighted code.
Article contents
Paste into Word
To copy color syntax highlighted code into Word, copy your selected code from VS Code and paste it into Word. If you are using the “Light (Visual Studio)” theme, the result will look something like this:
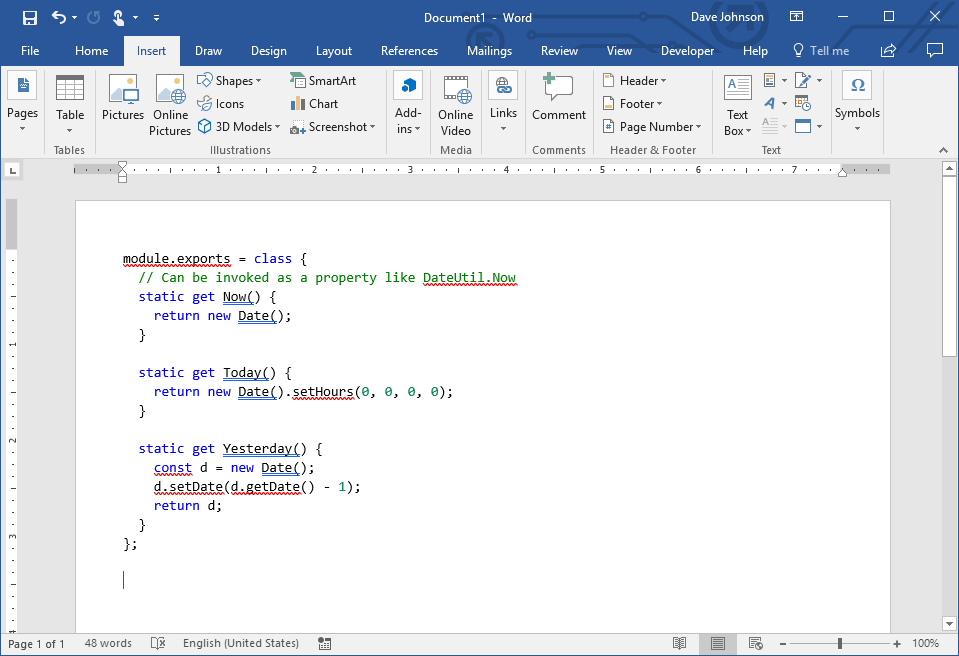
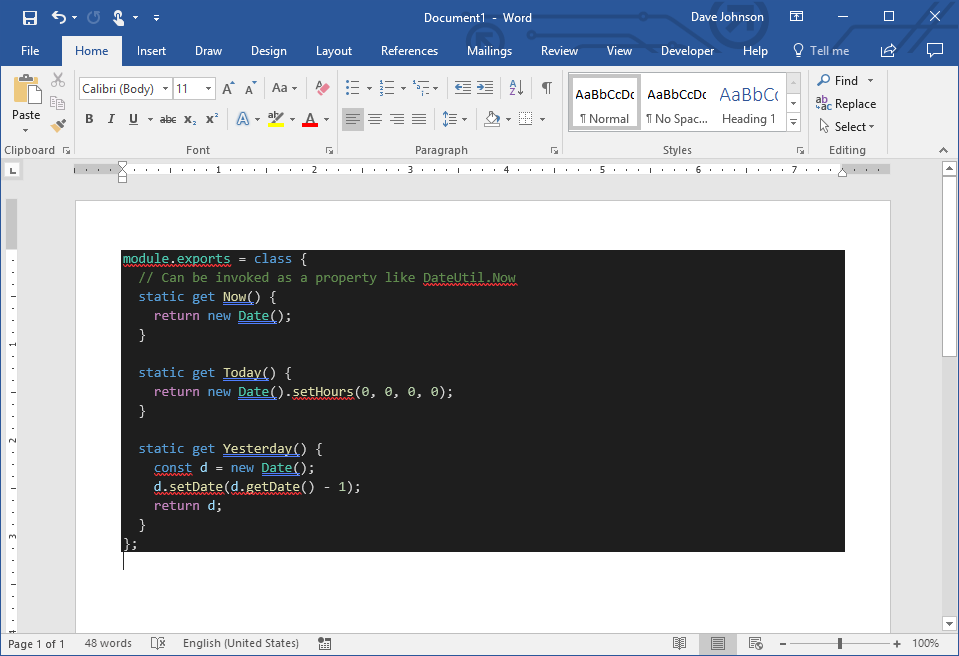
How awesome is that? Word is bit problematic due the red squiggly lines it provides for spell checking, but we just achieved color syntax highlighting for free with very little effort on our part. If we are using a theme with a darker background, the results will look something like this:
To keep Word from filling the entire width, you can carry out these steps if you are so inclined:
- Insert a 1 x 1 table into Word. (Insert | Table)
- Copy the selected code from VS Code and paste it into this table.
- Right click on the table and choose
Table Properties. - Select the “Borders and Shading” button.
- Change the
Fillbackground to match your VS Code theme. For the “Dark+ (default dark)” theme, for example, the background color is (Red = 30, Green = 30, Blue = 30). - Select the
OKbutton.

- Select the
Optionsbutton. - Change the default cell margins to provide more spacing for the code. For example, 0.1″ all around.
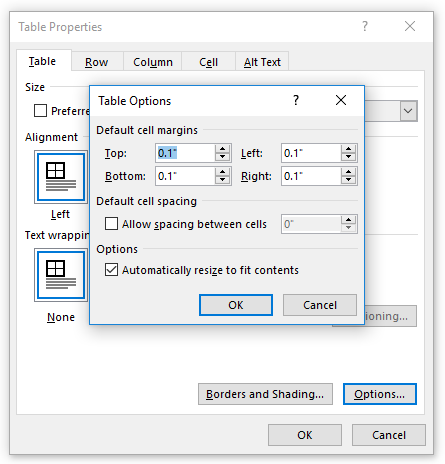
- Select the
OKbutton and then select the nextOKbutton. - Select the text and change the text/font highlight color to “No Color”.
- Drag the right edge of the table to adjust the table width as needed.
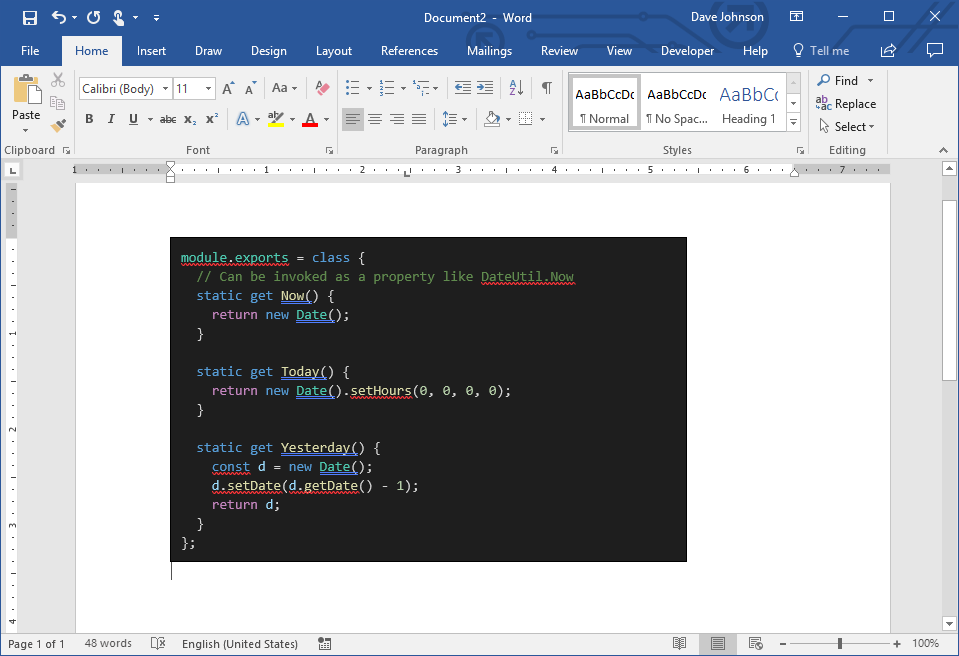
The result looks better with a narrower width:
Note
Working with dark background text requires additional steps. If you typically use a dark background theme, but want to use a white background theme for communication, you can quickly swap VS Code themes using `[Ctrl+K Ctrl+T]` and selecting “Light (Visual Studio)”, for example.
Paste into PowerPoint
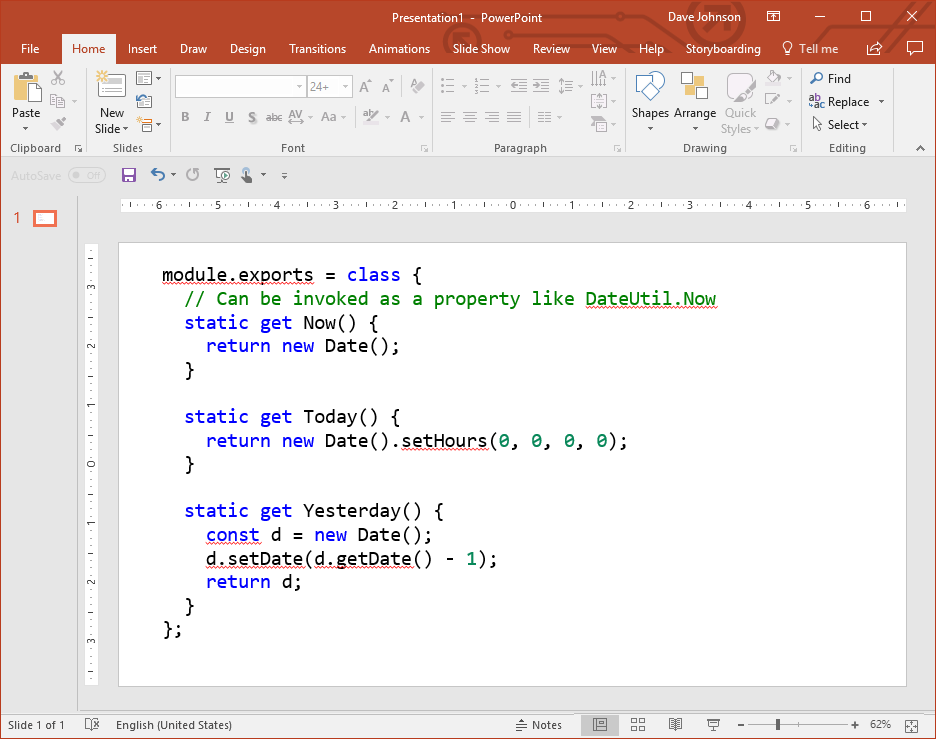
We want to be able to share our syntax highlighted code in presentations so let’s run through the steps to make this happen in PowerPoint. Here are the steps for syntax highlighted code with white backgrounds:
- Copy the selected code from VS Code and paste it into Word. If we paste it directly into PowerPoint, we unfortunately lose the tab/spaces indentation.
- Copy the text from Word and paste it into PowerPoint.
- Adjust the line spacing to
1.0since it comes over from Word with a line spacing value that is less than one. - Change the font to “Consolas” or other monospaced font of your choice, and increase the font size as desired.
The result will look something like this:
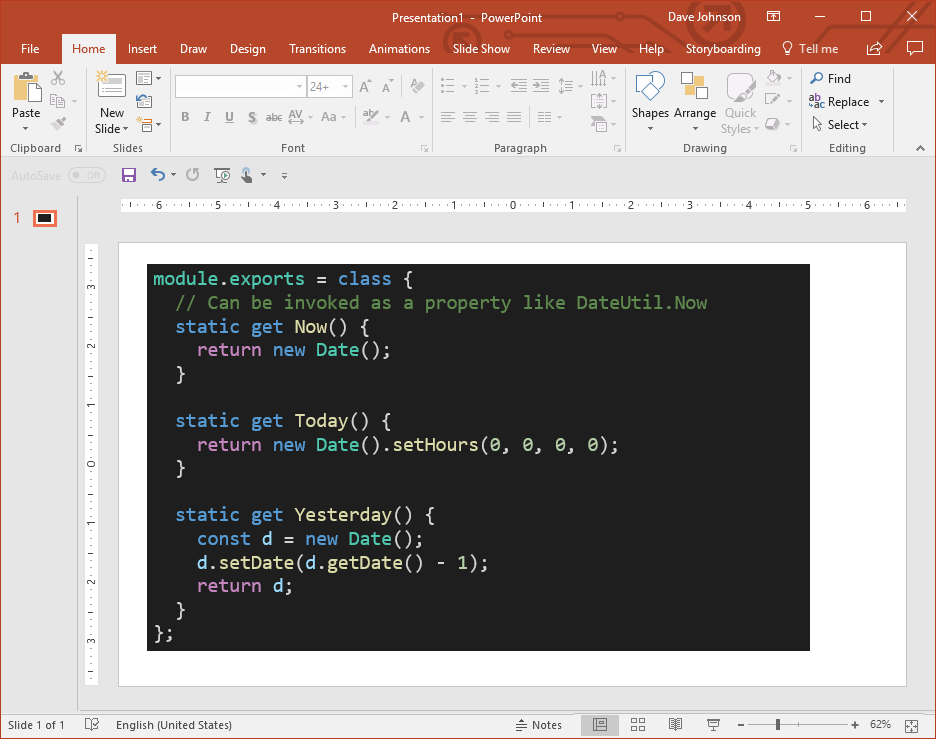
For dark backgrounds, do the following:
- Create a text box in PowerPoint.
- Fill the text box with a background color that matches the VS Code theme. For the “Dark+ (default dark)” theme, for example, the background color is (Red = 30, Green = 30, Blue = 30).
- Copy the selected code from VS Code and paste it into Word. If we paste it directly to PowerPoint, we lose the tabs/spacing indentation.
- Copy the text from Word and paste it into PowerPoint. When pasting, be sure the paste option is set to “Keep Source Formatting”.
- Adjust the line spacing to one since it comes over from Word with a line spacing value that is less than one.
- Change the font to “Consolas” or other monospaced font of your choice, and increase the font size as desired.
We are ready to make beautiful presentations!
The red squiggly spell-checking lines go away when viewing the PowerPoint presentation in slide show mode.
Paste into Outlook
Using Outlook to share syntax highlighted code can be very helpful, especially in the corporate world. Once again, we’ll first cover pasting code containing a white background. These steps are easy:
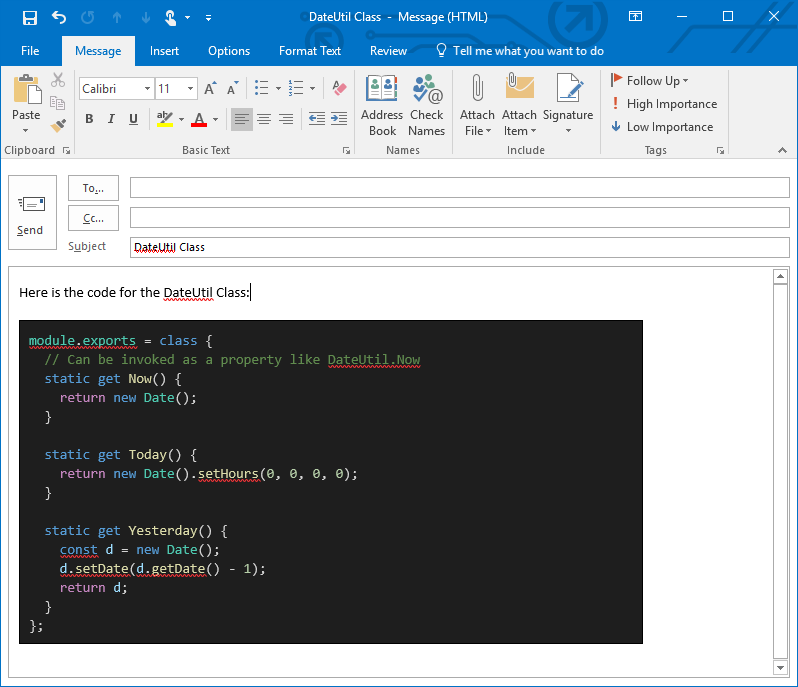
- Copy the selected code from VS Code and paste it into the Outlook email message you are composing.
We’re done! The tab/spacing indentation is retained and thus we don’t need to paste it through Word first.
To paste with a dark background, the procedure is a bit more involved (but may be worth it to you for the aesthetics if you’re like me. 😃)
- Insert a 1 x 1 table into Outlook. (Insert | Table)
- Copy the selected code from VS Code and paste it into this table.
- Right click on the table and choose
Table Properties. - Select the “Borders and Shading” button.
- Change the
Fillbackground to match your VS Code theme. For the “Dark+ (default dark)” theme, for example, the background color is (Red = 30, Green = 30, Blue = 30).
- Select the
OKbutton. - Select the
Optionsbutton. - Change the default cell margins to provide more spacing for the code. For example, 0.1″ all around.
- Select the
OKbutton and then select the nextOKbutton. - Select the text and change the text/font highlight color to “No Color”.
The result looks beautiful and the red squiggly spell-checking lines will go away when the email is sent to the recipients.
Paste into OneNote
OneNote is an amazing tool, and I often paste syntax highlighted code there for future reference. Here’s how it’s done for white background themes:
- Copy the selected code from VS Code and paste it into Word. If we paste it directly to OneNote, we will get the syntax highlighting, but we lose the tab/spaces indentation.
- Copy the text from Word and paste it into OneNote.
- Change the font to “Consolas” or other monospaced font of your choice, and change the font size as desired.
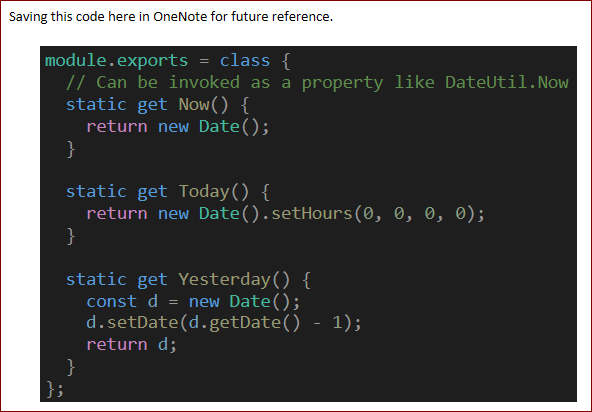
For dark background themes:
- Copy the selected code from VS Code and paste it into Word. If we paste it directly to OneNote, we will get the syntax highlighting, but we lose the tab/spaces indentation.
- Copy the text from Word and paste it into OneNote.
- Highlight the text in OneNote.
- Insert a 1 x 1 table. (Insert | Table). This will create a table that surrounds your code.
- Click inside the table and change the shading (fill) color of the table using the
Shadingtoolbar option underTable Tools:
For the “Dark+ (default dark)” theme, the background color is (Red = 30, Green = 30, Blue = 30). - Click
Hide Bordersin the sameTable Toolstoolbar area. - Change the font to “Consolas” or other monospaced font of your choice, and change the font size as desired.
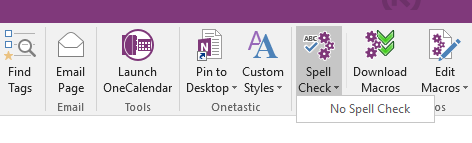
To remove the red squiggly spelling error indicators, install Onetastic and the No Spell Check macro. Highlight the code you pasted, and from the OneNote toolbar, and select Spell Check | No Spell Check:
You now have beautiful code snippets in OneNote that are syntax highlighted!
Paste into Gmail
We can paste syntax highlighted code into Gmail as well. For white background themes:
- Copy the selected code from VS Code and paste it into the Gmail message you are composing.
No additional steps required! The tab/spacing indentation is retained and thus we don’t need to paste it first through Word.
For dark background themes, follow the steps above for white backgrounds and declare victory. The only issue with pasting the dark background theme is that the dark background fills the entire width of the email message no matter what width is used:
If you’re a compulsive, nitpicking perfectionist like me 😉, carry out these steps instead for black background themes:
- Open Google Docs and create a 1 x 1 table. (Insert | Table | 1 x 1)
- Click in the table and change the background color of the table to match the background of your dark theme by selecting the background color button from the toolbar. For the “Dark+ (default dark)” theme, the background color is
#1e1e1e. - Change the table border color to transparent by selecting the
Border coloricon from the toolbar. - Copy the selected code from VS Code and paste it into the Google Docs table.
- Drag the right edge of the table to adjust the width as needed.
- Copy the table from Google Docs and paste it into your Gmail message.
The result is very pleasing, and your email recipients will be impressed as well!
Conclusion
We can produce some beautiful syntax highlighted code snippets in various applications. To create syntax highlighted code samples with white background themes, you simply paste the code right into the target application and you’re done—except for PowerPoint and OneNote which require that you paste through Word first to retain the tab/spaces indentation. For dark background themes, a little more work is involved, but the result is truly a work of excellence.
Additional articles
Build an Amazing Markdown Editor Using Visual Studio Code and Pandoc
Build an Amazing HTML Editor Using Visual Studio Code
Visual Studio Code Jumpstart for Node.js Developers
Right click on Windows folder and open with Visual Studio Code
Follow @thisDaveJ (Dave Johnson) on Twitter to stay up to date with the latest tutorials and tech articles.

Dave Johnson, thanks! And thanks for sharing your great posts every week!
very helpful. Thanks.
Thanks
There is a better alternative, Insert > Object > OpenDocument Text or something like this. This will open a new window that we will paste our code, which we can have our own formatting rules that are not affected by parent document (color, font, etc). Also there is no grammar highlighting