In preparing for my upcoming tutorial which is a beginner’s guide to installing Node.js on a Raspberry Pi 2, I ran into an issue. After getting the RasPi is up and running on the network, I was not able to ping its hostname (raspberrypi, by default) from another machine and find it so I could connect to it through Putty, xrdp, VNC, etc. After all, I wanted to be able to run headless and disconnect the monitor, USB keyboard/mouse, and still connect to it from another machine on my network.
One option was to run ifconfig on the RasPi and take note of the IP address for eth0 (if connected through Ethernet) or wlan0 (if connected through Wi-Fi). I could then hard code this IP address in the hosts file on the Windows (or other) machine. The problem is that the RasPi retrieves its IP address through DHCP by default from my local router at home, and this IP address is not guaranteed to remain the same. I could log into my router and note the static IP address range and reconfigure the RasPi to use one of these static IP address rather than DHCP. However, I am preparing a beginner’s tutorial and not all of my readers want to become Linux TCP/IP networking experts.
I discovered an elegant solution if you are trying to ping and connect to the RasPi from another Windows machine on the same network. Samba to the rescue!
Samba is an implementation of the SMB networking protocol and it allows Linux machines (including the RasPi) to inter-operate with Windows machines and look like another Windows machine on the network. Most people think of installing Samba when they want to create Windows file shares on the RasPi. By virtue of installing Samba—even if you are not planning to do file sharing with Windows machines—you get the benefit of having your RasPi broadcast its hostname and become discoverable to the Windows machines on your network.
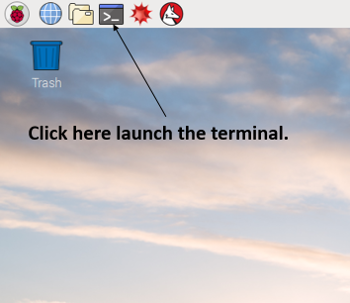
Let’s go ahead and install Samba on our RasPi. First, launch the terminal as shown in the following Raspbian screenshot.
From the terminal $ prompt, enter the following command:
$ sudo apt-get -y install samba
The “-y” option will automatically answer yes to the default questions which is what we want in this context.
After the installation is complete, jump over to your Windows machine and enter the following command from the prompt:
C:/> ping RASPBERRYPI
Please note that the host name (RASPBERRRYPI) is entered in upper case. This is required if you are running Windows 10 update 1803 or higher since NetBIOS/WINS name resolution changed in this release. As another option, you can issue this command with the host name in lower case:
C:/> ping -4 raspberrypi
This will resolve the host name using IPv4 rather than IPv6 and the name should resolve.
Your Windows machine should respond back with successful ping replies. You no longer need to remember the IP address of your RasPi to ping it, connect to it from Putty, etc. or hard code it in your hosts file and hope it does not change.
After this works, you may also want to install the xrdp package so you can use the Windows Remote Desktop software to connect to your RasPi graphical user interface from your Windows machine. I’ll talk about that as part of my tutorial in the next post.
Hope to see you then!

Dave
I have followed your Beginner’s Guide to Installing Node.js on a Raspberry Pi (twice) and am not able to ping the raspi from my windows 10 laptop. I have disabled my Norton firewall and still no luck. I can access the internet from the pi so I know I am connected to my home wifi network.
Any suggestions?
Thanks in adavance
Geoff
Got it.
Setting on PC wasn’t set to make computer discoverable. Under Settings >Network & Internet> Advanced Settings on windows 10, turned on “Make the PC discoverable”
Hope this helps if anyone encounters this problem.
Hi Geoffrey, I’m glad you were able to get it working! Great troubleshooting by the way! Thanks for taking the time to document so others can benefit.
Thank you very much for this additional debug. I was running into the same problem and once I made my computer able to be discovered, it worked.
Thank you for this tutorial. I’ve been scratching my head for the last hour trying to get connected via hostname, turns out all I had to do was install Samba! Instant success.
i follow the steps but i still can’t get the hostname ping working.
C:\>ping -a 172.27.11.7
Pinging RPI_JPA_NETBIOS [172.27.11.7] with 32 bytes of data:
Reply from 172.27.11.7: bytes=32 time=31ms TTL=63
Reply from 172.27.11.7: bytes=32 time=11ms TTL=63
Reply from 172.27.11.7: bytes=32 time=9ms TTL=63
Reply from 172.27.11.7: bytes=32 time=6ms TTL=63
Ping statistics for 172.27.11.7:
Packets: Sent = 4, Received = 4, Lost = 0 (0% loss),
Approximate round trip times in milli-seconds:
Minimum = 6ms, Maximum = 31ms, Average = 14ms
C:\>ping RPI_JPA_NETBIOS
Ping request could not find host RPI_JPA_NETBIOS. Please check the name and try again.
C:\>
It is working with samba – thank you!
working for me with samba. Thanks a lot.
Thanks a ton! Worked like a Charm! I use this to ssh and sftp into my RaspberryPi Photo Frame that I created with an old laptop screen. Ran into the exact issue when the local DHCP on my router gave the frame a .2 address instead of the previous .4. Thanks for the tip to install Samba to make it available!
Brett – very awesome. I’m glad my article was helpful to you! Thanks for taking the time to say thanks and share your story of success.
Hello,
It was also the solution for me, thanks dude!
I am using Raspberry Pi model3 and it is not working for me: ping request could not find host raspberrypi. Please check name and try again. Please help!!!
model 3B
Shay, thanks for the heads up. I have identified the issue and updated my article accordingly. An update to Windows 10 has caused issues (assuming you are trying to connect from Windows 10). Please enter your host name in upper case and the ping should work. You will also need to enter the host name in upper case when connecting through SSH, Remote Desktop, etc.
Windows 10 does not require uppercase network names, not sure where you got that idea from?
C:\Users\xxxx>ver
Microsoft Windows [Version 10.0.19043.1320]
C:\Users\xxxx>tracert 192.168.0.1
Tracing route to RT-AC68U-EC00 [192.168.0.1]
over a maximum of 30 hops:
1 <1 ms <1 ms
C:\Users\xxxx>
C:\Users\xxxx>
C:\Users\xxxx>ping rt-ac68u-ec00
Pinging rt-ac68u-ec00 [192.168.0.1] with 32 bytes of data:
Reply from 192.168.0.1: bytes=32 time<1ms TTL=64
Reply from 192.168.0.1: bytes=32 time<1ms TTL=64
Reply from 192.168.0.1: bytes=32 time<1ms TTL=64
Reply from 192.168.0.1: bytes=32 time<1ms TTL=64
Ping statistics for 192.168.0.1:
Packets: Sent = 4, Received = 4, Lost = 0 (0% loss),
Approximate round trip times in milli-seconds:
Minimum = 0ms, Maximum = 0ms, Average = 0ms
I cannot ssh to my Pi unless I have immediately before logged in via a physical keyboard, after a very short time it seems that ssh and WinSCP no longer work, the Pi cannot be pinged or traced, which is why I have commented